Low Light Photography Tips – A Shot In The Dark
A beautiful canvas print starts with a great photograph.
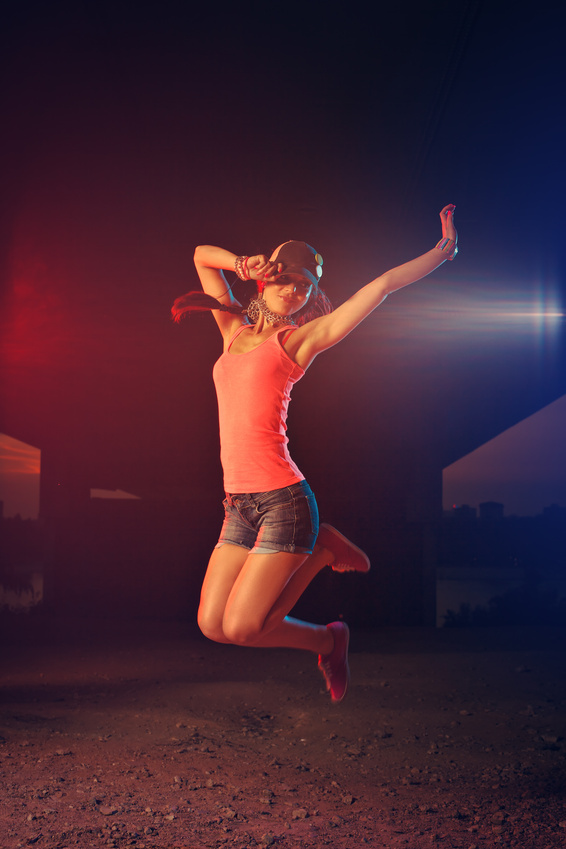
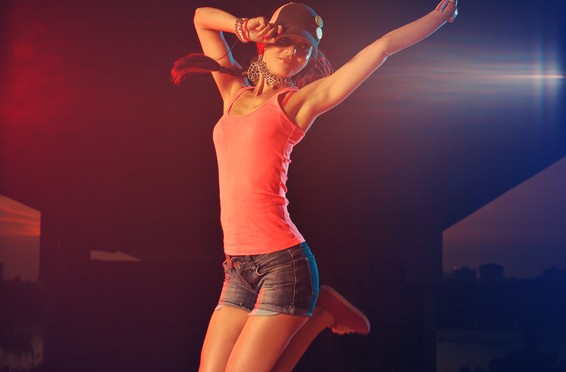
Anyone can take a photo during the day, but the real challenge—and often the real beauty—lies in taking excellent low-light and night-time photos. These low light photography tips will help you to develop a better understanding of how to consistently achieve high-quality photos after the sun goes down.
Know your camera
The first step toward excellent night photography is to be very familiar with the settings and functions of your camera. There are four main things to know:
• Aperture. Also called a F/stop, aperture controls the depth of field—the larger the f/stop, the more things that will be in focus. For portraits, f/4 or f/5.6 is usually fine, for landscapes, try it around f/16. Smaller numbers correspond to brighter photos with a shallow depth of field, and larger numbers relate to darker images with a broader depth.
• ISO. This is your adjustment for light sensitivity. 100 is perfect for sharp images outside during the day, but at night you need to adjust up to 3200. The higher the number, the more noise that will be in your photographs.
• Shutter speed. This is what controls how fast the lens closes. Speeds of 1/320, 1/500, or even 1/1000 are great for freezing fast moving objects, but fast speeds do not allow as much light in, especially at night,
• Exposure. On the display of your DSLR camera is a meter. When your other settings are adjusted appropriately for your setting, the exposure line will usually be at 0. There are exceptions to this rule, so you may have to adjust it for your tastes.
Adjust your settings to find one that works best for your night shots. Try starting in manual mode with a F/stop at 16, ISO at 800, and shutter speed at 1” and tweak your settings from there.
Shoot in RAW
Most DSLR cameras have a RAW mode. If you are equipped with it, definitely use it for your low-light photography. RAW gives you much more control of the editing process by including much more information with each shot. You’ll be able to adjust white balance, brightness, and colour with much less noise and distortion, and in turn, you'll achieve quality canvas print results.
Don’t use the flash
While a flash certainly has its uses, oftentimes at night, it will white-wash and flatten the image, reducing the depth of field and overall diminishing the image. Learn to configure your settings to give you plenty of light even when not much is available to achieve more dynamic photography.
Use a tripod
Tripods are a nighttime photographer’s best friend. Slower shutter speeds will inevitably make your photographs more prone to motion blur. To remedy this, you need a very steady hand, in the form of a tripod. Your tripod will quickly become your best friend as you learn to work with it. Experiment with drastically longer exposure times and watch as you can light up the night.
Plan ahead
Candid shots, while possible, are much trickier to achieve in situations that have scarce lighting. It’s important to take the time to plan each shot. If you anticipate taking many different photos in the same setting, the first experiment with your camera’s settings to ensure you have it adjusted properly for the given environment. Once you have the settings on-point, it will be much quicker for you to adjust minutely between shots.
Following these low light photography tips will empower you to take better photographs in low-light settings. Whether your subject is a sleeping baby, a mountain landscape, or the night sky, you’ll be well on your way to having images worthy of a Parrot Print Canvas in no time!