The Comprehensive Beginner’s Guide to Photography
The Comprehensive Beginner's Guide to Photography
Smartphones and social media have heightened interest in photography, but it takes more than a few selfies to become a skilled photographer. To create images worth framing or printing onto canvas, expect to invest some time into developing your photo composition skills and learning the main photography techniques. Good equipment and plenty of practice will also help you develop a skilled eye that will allow you to create beautiful photographs.
This guide will explain the basics of photography equipment, camera operation, lighting, composition and processing so you can take the best possible photographs.
Choosing Digital Camera Equipment
Don't get trapped into thinking you need to spend thousands of pounds to get a good camera. When looking for digital camera equipment for the first time, visit a local camera shop. There you'll be able to test equipment and get recommendations on which camera to choose. Renting equipment for the day can also let you try a particular camera model without investing in one. Also, consider purchasing used photography equipment initially. If you don't have access to a local camera shop, search reputable websites for camera recommendations and reviews for beginning hobbyists before purchasing a camera online.
As you develop your skills as a photographer, you'll be able to pick the best gear based on your own preferences and shooting style. Don't make a large initial investment unless you're prepared to spend even more money once you've gained experience.
Smartphone Cameras
Once only suitable for grainy selfies, smartphone cameras can now take photos that rival the photos you can take with some point-and-shoot cameras. However, smartphone cameras still can't produce the image quality that DSLR cameras can create. Plus, a fixed lens limits your focal length to one option, which restricts the types of photographs you can take. Use your smartphone to hone your photography skills, but don't expect it to be your primary camera if you're serious about photography.
Point-and-Shoot Cameras
Point-and-shoot cameras are lightweight, portable and inexpensive when compared to DSLRs. Point-and-shoot cameras have a permanently attached lens with a zoom range, so your focal length is extended, and most cameras have some manual settings. For many beginners, point-and-shoot cameras can be a great starting point. Advanced amateurs can quickly outgrow a point-and-shoot because of limited manual settings.
DSLR Cameras
Most professional photographers use digital single-lens reflex cameras to capture images. Unlike smartphone cameras and point-and-shoot cameras, DSLRs have lenses that detach from the camera body and have full manual settings. These essential features allow you to use a variety of lenses and have complete creative control over the functions of your camera.
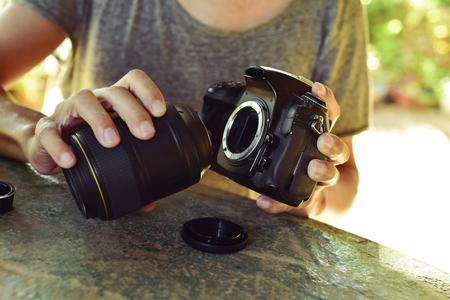
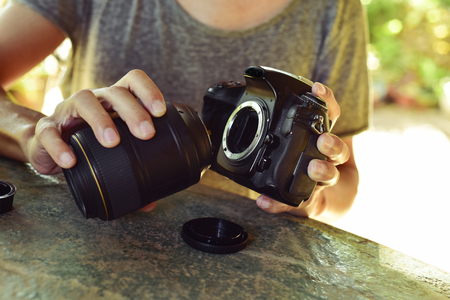
When investing in a DSLR camera, consider purchasing the camera lens and body separately, and avoid lens kits. In general, individually sold lenses are of higher quality. Consider purchasing a single lens -- 50 mm and 35 mm are good choices -- and master using that single lens before buying another.
Mirrorless Cameras
Though they have many of the features of DSLR cameras, mirrorless cameras don't use a mirror to create images. Therefore, the body of a mirrorless camera is lighter than that of a DSLR. Most mirrorless cameras have smaller sensors than DSLRs, which means you'll have limited range when shooting in low light conditions or when registering depth of field.
Buying Camera Accessories
As a beginning photographer, you'll only need a few basic accessories to use and protect your camera. After you've gained some experience, you may find that you'll need to add a remote control, filters, external flashes or other accessories to take the photographs you want to create. But for now, you should only need this basic arsenal of tools.
Camera Bag
Invest in a bag that will safely store your gear and is small enough for you to carry easily. If you're worried about the bag's appearance, you can buy a camera insert for an existing messenger bag or backpack instead.
Memory Cards for Digital Cameras
Buy at least three memory cards to use with your primary camera. Try to use all three cards during a shoot, so if any card becomes corrupted, you'll still have some of your images. Start with memory cards that are at least 16 GB each.
When purchasing a memory card, make sure the format matches your camera's specs, and invest in at least a Class 6 card. You'll need a Class 10 card if you decide to take action shots with a high-resolution DSLR camera.
Camera Batteries
Purchase at least one backup battery for your camera, and make sure both batteries are fully charged before beginning any shoot.
Cleaning Tools
Always keep a few lens pens handy to remove any smudges on the lens. A rocket blower will quickly dislodge dust from sensors and lens, while a microfiber cloth will allow you to quickly clean off the camera body.
Other Accessories for Digital Cameras
There are hundreds of other accessories available, but your needs will vary depending on the shots you like to take. Tripods are essential if you do long-exposure photography or a lot of landscape work, while camera remotes are indispensable if you're interested in self-portraiture. Filters can also help reduce glare, haze and other undesirable qualities in images.
Understanding Basic Automatic Camera Settings
Automatic mode may be the most popular camera setting, but it limits the types of photographs you can take. If you're not ready for the manual setting yet, or you have a point-and-shoot camera without a manual setting, understanding how each automatic setting works is crucial. Each camera has different mode settings, so read the owner's manual of your camera if you're interested in using one of specialised modes.
Aperture Priority Mode
The aperture priority mode allows you to pick the size of the hole in your lens while the camera adjusts all of the other settings, including shutter speed. This semi-manual mode is useful when you want to be able to control the depth of field in your image.
If you want to focus on an object in the foreground, while blurring the background, you can shoot with a wide open aperture using the aperture priority mode. A wide open aperture is another term for the maximum aperture, which differs by lens. When you use the maximum aperture, the shutter speed is short. However, when you want equal focus between foreground and background, you can choose a smaller aperture, such as f/22, and the camera will pick a longer shutter speed.
Automatic Mode
This mode leaves almost every choice in the hands of the camera software. All you need to do is properly compose the photograph. Unfortunately, even your high-end camera's automatic mode makes certain guesses when choosing shutter speed, aperture, focus and other settings that can be wrong. An actual photographer choosing these settings is always best.
Landscape Mode
Landscape mode helps your camera avoid focusing on objects in the foreground and increases the depth of field. This mode allows you to include several items of interest within the image, rather than focusing on a single point of interest.
Macro Mode
When photographing small items, macro mode helps you focus on the subject of your image. Use a tripod with the macro mode, and never use your camera's flash. If extra lighting is necessary, set it up before the shoot.
Night Mode
Night mode combines a longer shutter speed with a flash to light your subject. This setting works for night-time landscape shots, but it is also a great choice when taking pictures at a night-time concert. Use a tripod to steady the camera if you want to reduce any blurring in the background.
Portrait Mode
Portrait mode helps you focus on the subject of your shot by minimising the background and other competing objects. Therefore, you'll need to ensure that the subject of the portrait isn't too far away; portrait mode is best for upper body shots.
Shutter Priority Mode
This semi-manual mode allows you to choose the shutter speed, but allows your camera to choose all of the other settings before taking a photograph. This mode is useful when you want to take motion shots, or want to create a blur within the photograph by choosing a longer shutter speed.
Sports Mode
Ready to document your local sports team's path to victory this year? Sports mode helps you photograph moving subjects with your camera. Also called action mode, this setting increases shutter speed so you can catch pets, kids, cars and other subjects in motion.
Photographing in Manual Mode
Manual mode allows you to tell the camera exactly how to take a photograph so you can get the best possible results. Going fully manual may feel intimidating, but it's the best way to learn exactly how different camera settings work together to create an image. Luckily, with a digital camera, you have endless opportunity to experiment until you get exactly the right settings.
In manual mode, you need to set the aperture, ISO and shutter speed. These three settings work in tandem, so it's important to consider how one setting will affect the other two when choosing settings. There are also rules of thumb that apply depending on the subject of your photograph and the overall light conditions.
Setting the Aperture
The aperture affects how much light enters the camera. You measure the aperture size with f-stop numbers, where lower f-stop numbers indicate that more light is entering the camera. When an image is too dark, you should lower the f-stop number. When an image is too bright, you should raise the f-stop number. The aperture also affects the depth of field. If you want a fuller depth of field, you'll need a higher f-stop, such as f/18. A lower f-stop, such as f/5.6, will create a shallower depth of field.
Setting the ISO
The ISO setting affects the camera sensor's sensitivity to light. The lowest possible ISO is best when high-quality shots are the priority. Higher ISO numbers are associated with higher shutter speeds but also more noise. Therefore, you should carefully lower your aperture number and increase your shutter speed before significantly increasing your ISO speed. In perfect lighting conditions, an ISO 100 is fine, but in low light conditions, you'll need a faster ISO speed to prevent blurriness.
Setting the Shutter Speed
When shooting movement, always set your shutter speed first. For these types of photographs, start at 1/500 of a second and then decrease the speed slowly depending on your subject. Low-level movement shots, such as a landscape shot, may only require 1/60 to 1/100 of a second. Photographing people typically requires a 1/180 of a second or faster. When using slower shutter speeds, you'll need to use a tripod to prevent unintentional blurring.
Setting the White Balance
Most DSLRs will let you set the white balance even in automatic mode, or the camera will choose automatic white balance before taking a photograph. Digital cameras typically have several settings named after the lighting conditions they match. You can also manually set how warm or cool the light in your photograph appears through your camera's settings.
Photography Lighting
Many professional outdoor photographers only need the sun to create a perfect shot. Meanwhile, studio photographers will spend thousands on professional lighting set-ups calibrated for each specific shoot. As a beginning photographer, a camera flash, good natural lighting, a reflector or some combination of the three light sources, will produce excellent photographs.
In most cases, you'll want to use natural lighting. If you want to highlight your subject subtly, or there isn't quite enough light, use your camera's flash. In most cases, you'll want to use a bounce card to diffuse the light the flash emits. Or, you can angle the camera's flash so the light faces a light-coloured ceiling or wall at a slight angle. Then the light from the flash will reflect off the area and illuminate your subject.
When taking portraits outside, a reflector is an inexpensive way to subtly bounce some light into your subject's face and eliminate unflattering shadows. When using a reflector, experiment with the angle of the reflector until your subject's face is properly lit for the image you want to create. Many photographers use reflectors to eliminate shadows underneath the eyes and chin.
Reflectors come in a variety of sizes, shapes and materials, so it's not uncommon for photographers to have several. Many reflectors come with a variety of covers, so you can change the colour of the reflector depending on your image's needs.
Basic Photography Composition Rules
For every rule on this list, you can find at least a dozen professional photographers who successfully break it. But when you're a beginning photographer, these guidelines give you a place to start when developing your own eye.
Using the Rule of Thirds
When taking a photograph, mentally divide the horizontal and vertical space into thirds. Try to align major aspects of your photograph, such as the horizon line, along one of these guidelines. For non-linear elements, try to position them so they are centred where a horizontal and vertical guideline meet.
Embracing Symmetry
Consider breaking the rule of thirds when photographing something that is naturally symmetrical. Highlight that symmetry and frame it evenly with your camera.
Eliminating Compositional Noise
Simplify the images you create to focus on the most important elements. If possible, eliminate any item that detracts from the subject of your photograph.
Centring the Dominant Eye
When taking a portrait, try centring the dominant eye along the vertical centre of the photograph. This makes the viewers feel as though they are being watched by the subject.
Considering the Foreground
If you think that your photographs seem flat, try to include elements in the foreground, as well as the midground and background, when composing a shot.
Using Leading Lines
If possible, use lines within the image to lead the viewer's focus to a specific area within the photograph.
Trying Different Viewpoints
Altering the viewpoint also affects how the viewer perceives the size of the items in your photograph. To emphasise the size of your subject, shoot upwards. To make the subject seem smaller, shoot downwards.
Embracing Natural Framing
Use doors, windows, trees or other elements to create a frame that highlights the main focus of the photograph.
Shooting the Odd Number
If you have the option, photograph an odd number of similar objects. These items could be columns, birds, arches or apples.
Assessing Your Image From Left to Right
Just as you read left to right, viewers assess images left to right. Therefore, if there's movement in your photograph, such as a runner or a car, the subject should travel from the left towards the right side of the image.
Processing an Image Taken With a Digital Camera
One significant advantage of using digital cameras is the ability to easily edit your images. While editing images was once controversial, most photographers now accept that digital editing is a valid part of the discipline. The right edits can turn a good image into a great one, so learning how to alter photographs is worth your time.
Choosing the Right Photo Editing Software
For most beginners, Adobe Lightroom provides enough features to edit and organise your images. If you want to complete some retouching, you'll need to invest in Adobe Elements, or if you'd like to be able to fully manipulate your images, consider Adobe Photoshop. Adobe typically offers a free trial, so you can decide which program meets your needs.
If you're on a budget, each of these Adobe products has low-cost or free competitors that will offer many of the same tools. For example, GIMP is a free program that offers many of the same features as Photoshop and is suitable for most photographers' editing needs. When picking an alternative software product, make sure it has enough support so you'll be able to learn how to use it effectively.
Calibrating Your Monitor
Before beginning any colour editing on a photograph, make sure your monitor is calibrated properly. Otherwise, once you order some canvas art prints of your favourite images, you may find that the colours aren't what you expected. Professional photographers have high-quality IPS LCD monitors that may cost more than your entire photography kit, but you can find an acceptable IPS monitor for the cost of an average computer monitor.
Performing Common Image Edits
When editing an image, remember that a light hand is usually best. Overly edited images are a stylistic choice, but one that can easily look garish without restraint. After loading an image into your chosen program, consider checking these areas for possible improvements.
Choosing Image Framing
Most images benefit from cropping. Many images may only need a slight crop to tighten the overall frame. When reviewing your images, you may realise that the real star of the shot was lost in the overall composition. In these cases, an aggressive crop can salvage a mediocre image.
Adjusting Contrast Levels
Examine your image closely to decide if you need to heighten shadows or boost any highlights. If possible, use layers to adjust the contrast of highlights and shadows individually, so you have better control over the final image.
Examining Colour Saturation
Tweaking the colour saturation of your image can make a tepid photograph become more vibrant. However, constantly refer to your original image to avoid oversaturation, which can give your images a cartoonish quality.
Removing Noise
Some photographers refer to noisy images as grainy images. Removing noise while preserving image detail is difficult even for talented photo editors. As a beginner, you may want to examine the RGB channels to look for opportunities to eliminate noise.
Mastering Digital Photography
Don't make the mistake of believing that the right combination of gear or the best editing software will make you an exceptional photographer. Regular practice will help you take amazing photos with average equipment, so try to set aside some time each week to take some photographs. Then, later in the week, you can examine those photographs with a critical eye on your computer screen. If you regularly see the same problems in your images, don't be afraid to ask a more experienced photographer or an Internet photography forum for advice. There are also many books and hundreds of websites that will help you master your new hobby.
Once you get into the habit of taking photographs, you'll be surprised at how rapidly your skills improve. You'll be able to take good shots of your family, friends and holidays with relative ease, and feel at home with a camera in your hand.